About Me!

I began teaching fifth and sixth graders in the 2006-07 school year. Since that time I have taught 5th and 6th grade English Language Arts, reading and social studies. Currently I am teaching 8th and 9th grade ELA in my home district. I hold a professional teaching certification in New York State for both Elementary Education (1-6) and English Language Arts (7-12). and have my initial certification as a School Building Leader.

I believe one of my biggest strengths as an educator is my ability to integrate technology into the lessons. In fact, I earned a master's degree in integrating technology in the classroom. Many times I think teachers use technology as a bell or whistle and not as a tool to educate. It is great to get the attention of students with these bells and whistles, but it is even better to use these technologies to teach!

Tuesday, May 14, 2013

Experimenting with Nearpod

A few weeks back I was fortunate enough to attend the Mobile Learning Summit that was put on by NYSCATE.  Even though the conference was almost in spring we had to brave snowy weather while driving to Hamilton College, but it was well worth the trip.  I was able to spend a day networking, listening to and learning from educators of all different technology skill levels.

My philosophy while attending any type of professional development is simple: bring back at least one thing I can immediately try to use in my own classroom.  Being able to use one thing after sitting through a day long seminar or conference doesn’t seem like much, however I have found this philosophy to be very successful.  I have found that if I bring back ten or fifteen things and try to implement all of them in my classroom right away I am unable to implement any of them well.  After attending a conference I will look back over my notes and determine which new idea (or tweak on an existing idea) I can feasibly implement well immediately in my classroom.

When I attended the 2012 NYSCATE conference I was able to bring back and immediately implement the use of QR Codes in my classroom.  (I plan to post an "update" sharing some of the new ways I have been using QR Codes.)  From the NYSCATE Mobile Learning Summit I decided I was going to immediately begin experimenting and implementing an app called Nearpod.

An Introduction to Nearpod
The best way to describe Nearpod is to call it a mix between SMART Notebook, PowerPoint and SMART Response VE.  One of the things I liked best about Nearpod was that it gives me control over what my students see on their iPods (or other iOS device).  Nearpod is a free app with both iPad and iPod/iPhone versions.  In order to begin using Nearpod it is necessary to create an account.  There are three "levels" for accounts, one free and two that require subscriptions.  The level I have been experimenting with is free and called Silver Edition.  There are some things that you are unable to do with the Silver Edition and it does limit the amount of storage space you have, but it was more than enough for my class and I to get started.

Once you have set up an account you can create a presentation.  It is important to know that creating a presentation can only be done online, not through the app itself.  When you start to create a presentation you are given a choice to import a PDF file.  This will make each page in the PDF its own slide.  Since both PowerPoint and Keynote offer the option to export to a PDF this allows you to import PowerPoint and/or Keynote presentations.  Once you have imported the PDF you can change the order of the slides and add in other types of slides such as; quizzes, links, and videos.  Once you are satisfied with your presentation you need to publish it before it can be used with a class.

After publishing the Nearpod presentation the teacher app controls what happens on the student devices.  As the teacher goes from one slide, image or assessment to the next the screen changes on the students' devices.  Once the teacher launches the presentation students are required to enter a PIN in order for their device to sync with the teacher's device.
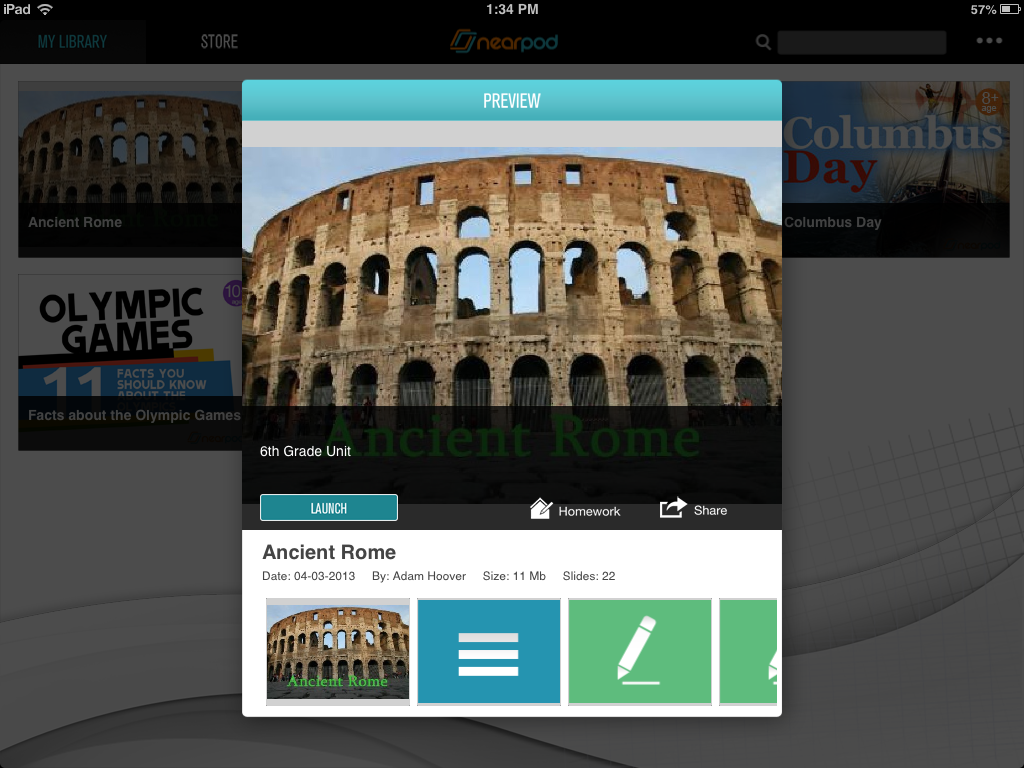
This is the iPad launch screen, once the presentation is launched a pin will be displayed on the top left of the screen.
This is the student device sign in screen


This is the screen the teacher sees on their device.  Below the slide is a preview of some of the other slides in the presentation. 
The student only sees the slide.  This allows the teacher to determine what shows up on the student devices.
What the teacher sees on their screen is different than what the student sees.  This allows the teacher to see who has signed in, while the students are signing in and it also allows the teacher to see the answers students have submitted.  There are several different types of assessments that can be created using Nearpod.  In addition to the obvious, matching, true/false and multiple choice, Nearpod allows for students to write or draw an answer and then for the teacher to see what the student wrote or drew.


Students use this screen to log in before taking a quiz.  Students can be assigned a username and identification number.
As students answer the questions the teacher is able to see the answers in near-real time.
This is the screen the students see when taking a quiz.  (It should be noted that only three choices show up on the screen at once.  If there are more than three choices for answers it may be necessary to remind the students of this fact, since it is not obvious from simply looking at a question.)

Students can write their responses using a finger or a stylus.  (Since iPod screens are small, questions are best limited to one word responses.)
As students submit their responses the teacher can see the responses on their screen.
Once students have completed the assessments on Nearpod the teacher is able to email the results to themselves as a PDF.  These results show how each student answered each of the questions.  It allows the teacher to really examine the data.

A pull down menu allows for the assessment results to be emailed to the teacher.
How Am I Using Nearpod in my Classroom?
For each of my fifth and sixth grade social studies units I have created a SMART Notebook file.  These files have the guided notes, that students "reveal" as we go through the unit, images, maps, multiple choice assessments, matching and links to internet resources.  These files have proven to be very valuable and successful in my classroom.  However, like anything, they are not without their drawbacks.  One of the drawbacks is the fact that I am not able to show images until all students have filled in the notes.  Another drawback is that only one student at a time can answer the multiple choice questions or match the vocabulary words to their definitions.  It was with these drawbacks in mind that I began experimenting with Nearpod.

The first Nearpod "slideshow" I created was a supplement to a sixth grade unit focusing on Ancient Rome.  I hoped to accomplish two main goals by using Nearpod; allowing some students to see images, maps and other visuals while other students were finishing up the guided notes and being able to have all students respond to assessments.  From my limited knowledge of Nearpod I believed that I would be able to accomplish these two goals.

As I created the Nearpod "slideshow" I made sure to include most of the images that were already a part of the SMART Notebook file.  Since I didn't already have a PDF to use I had to import each slide one at a time.  Adding the images to the Nearpod "slideshow" allowed me to show students images on their devices while still projecting the notes on the SMART Board.  For most images this method worked very well.  However, for some of the maps with small details zooming in was necessary.  This made it impossible for students to see the entire map on their screen.

Using Nearpod to recreate the same four or five question multiple choice assessments that were already part of the SMART Notebook file was simple.  By recreating these assessments my students were able to individually answer the questions before I called students up to the SMART Board to answer the questions in front of the class.  I was also able to almost instantly see data that helped me know to review certain concepts of the unit or move on to the next concepts.

With just a few days of experimenting I was able to use Nearpod to supplement my already created unit.  That is one of the best parts of Nearpod; ease of use.  Once you understand that you can't create slides from scratch on the Nearpod website (with the exception of the assessment slides and importing images), but instead must import existing files or images the creating of presentations is simple.  This is an even bigger positive if you already have files that have been created in the past and can be imported quickly.  One neat feature that I haven't mentioned would be for extremely organized teachers, planned student absences or long-term absences.  If planned ahead of time students can follow along (at least visually) with a Nearpod presentation from anywhere they have internet access not just from inside the classroom.  So in theory a student home sick in bed could follow along with a social studies presentation that was going on in school.

So far in regards to what I want to use it for, I have found very few negatives with Nearpod.  The one obvious disadvantage is the size of the screen if students are using an iPod.  The small screen makes it difficult to see details of images and to write/draw responses.  The student version of Nearpod can also be used on iPad and the iPad mini.  These screens would allow students to see the details of images and respond to writing/drawing questions easier.

Based on my experience (albeit limited) I would highly recommend Nearpod for any classroom that has a 1:1 ratio of students to iOS devices.

Thursday, February 7, 2013

Revolutionary War Trading Cards

One of the most valuable ways we use our class set of iPod Touches is with quick, in the classroom research.  In my fifth grade social studies classes we are in the middle of learning about the American Revolutionary War.  We first do a short overview unit and follow it up with a more detailed timeline style unit.  We just finished up the overview unit, but since we only have a little over a week before our February break I didn't want to start the detailed unit.  I'd imagine it is the same with most ages, but I have found with fifth graders a week off equals them forgetting everything we started.

I was surfing the internet looking for mini project ideas that were valuable learning experiences and that would take up the short time we have before our week of vacation.  After a little while I found a teacher's website who had her students make trading cards of different historical figures.  I "stole" this idea and went to work on creating a Revolutionary War trading card set.  The card set has ten cards; Benjamin Franklin, King George III, George Washington, Sam Adams, John Adams, Thomas Jefferson, John Burgoyne, Charles Cornwallis, Thomas Paine and John Hancock.  I created each card using Microsoft Publisher.  The fronts of the cards have the person's name the "side" they were on and a coloring book style portrait.  The backs of the cards have the person's name, a card number (1-10), a line for birth date, and lines for "career statistics."  The "career statistics" are what the person did during the Revolutionary War.


For some of the cards my students already knew some facts and could begin filling in the "career statistics" section.  However, for most of the cards the students had to look up information about the person using their iPod Touches.  This was not only a good opportunity for students to learn about Revolutionary War figures, but also a good opportunity for me to reteach and review the best methods for searching for information on the internet.

So far this mini project has proven successful and I may even expand it next year or to my sixth grade social studies classes.

Thursday, December 6, 2012

Going Paperless: Morning Journals Version 2.0

Last school year I used an app/website called "Lino It" for my students to do a morning journal entry.  (You can read about that in a previous post.)  By doing journals this way I was able to completely eliminate the use of paper as well as instantly see and respond to the journal entries of my students.  Lino It had many advantages, but also some disadvantages.  A few of the biggest disadvantages was that students could edit any post, not just there own, the posts would pile on top of one another and at times pile on top of and block the journal topic and students had to remember to add their names to the end of their posts.

It was because of these issues that I decided to embark on a quest to find a new way for my students to do paperless journaling.  After searching and experimenting with several different apps and websites I stumbled across Kidblog.  Kidblog is a secure blogging system for my students that I, and any other adult I grant "teacher" status to, can control.  As the teacher I am able to see posts before they go out to the rest of the class, edit posts and delete posts that need to be deleted for one reason or another. 

Kidblog was very simple to set up and I was able to use the same passwords my students use in the computer lab as their Kidblog passwords.  For the past week my students have been responding to journal prompts that I post on Kidblog.  As my students respond I review their responses and then post my own response to their journal post.  Not only do students get a chance to virtually interact with me, but they also get the chance to interact with their classmates.  This serves as a writing exercise, an exercise in the use of technology and also as a way to practice digital citizenship.

This is what students see before signing into their account.
Using several QR Codes, that I have hanging around my room, and their iPod Touches students can instantly get to the Kidblog sign in page.  Before signing in the only thing visible (to them and to anyone who stumbles across the site) is the title of posts, the author's username and the number of responses.  They cannot see what was written by me or any of their classmates until they have signed into their account.

One of my favorite things about Kidblog is that students do not have to remember both a username and password.  All of the usernames, which I have set up as the student's first name, are displayed via a drop down menu.  This allows them to simply select their name from the list.  Once signed in, students can view new posts, view responses to old posts and, although we haven't started yet, create and post to their own blog.  As time progresses I plan to have each of my students create their own blog and respond to the blogs of other students.

Thursday, November 29, 2012

QR Classroom!

This QR Code will take you to my blog.
During NYSCATE 2012 one of the most interesting sessions I attended dealt with Quick Response (QR) Codes.  Even if you are not familiar with QR Codes, chances are you have seen them.  One of the most common uses of QR Codes is as part of magazine advertisements.  If you see a QR Code and have a mobile device (cell phone, iPod, iPad, etc...) and a QR Reader app, scanning a code is a simple and quick process.  Last year, our library media specialist introduced me to QR Codes as a way to link to author and book websites, but I did not fully understand what they were capable of doing. Needless to say, I did not have a very good understanding of QR Codes and how they could be used in my classroom.  Walking into the session at NYSCATE 2012, I had believed that QR codes were only able to send you to a website.  That in itself is valuable and avoids users having to remember and type in long URLs, however the same could be accomplished by sending an email link to my students.  As the session began I was very excited to learn that QR Codes can be used for so much more!

In addition to URL links, QR Codes can be used to store and link to text, images, email addresses, Twitter accounts, map locations, Facebook accounts, videos, and even to send SMS text messages.  As you can imagine as a social studies teacher who has a class set of iPod Touches I was very excited to hear about these uses.  Less than a week of school after learning of these uses I have turned my classroom into a "QR Classroom."

The first thing I needed to do was make sure my iPod Touches had the capabilities of scanning QR Codes.  I was able to quickly download an free app called "i-Nigma" to each of the twenty-three iPod Touches I have in my classroom.  Teaching my students to use the app was quick and painless and after only a few days of experience many are "experts" at using QR Codes.  Now, only a few short school days after NYSCATE 2012, I have QR Codes hanging all over my room for several different uses.

Students can quickly reach my website with remembering the URL.

I even put a QR code in the hallway so parents can quickly reach my website.
One of the most common things I deal with in my classroom in regards to the iPod Touches is unsolicited advice from students on what apps we should download.  I decided that I would allow my students to suggest new apps.  On my classroom website I set up a form that allows my students to suggest apps.  The form asks for the name of the app, the price (free ones are much more likely to be downloaded!) and the reason why the app has educational value. After reading a few submissions I did edit the form to add a "Name" box.  This was not necessary, but I was getting a lot of very creative reasons that apps were educational and wanted to be able to pair the reasoning with the student who wrote it.  Another nice part about the form is that the submissions are emailed to me and automatically sorted into their own folder.  This allows me to examine the suggestions at my leisure.

App suggestion QR Code and Kidblog QR Code.
Some of the other QR Codes I have hanging throughout my classroom are an "Email Mr. Hoover" QR Code, a link to Kidblog.org, and a link to Culture Grams.  Kidblog.org is a kid friendly blogging service that I have begun using with my students (this may the subject of a future post).  Culture Grams is a research database that my fifth graders use for state research and my sixth graders use for country research.


Email Mr. Hoover QR Code

Another Email Mr. Hoover QR Code

Kidblog.org and Culture Gram QR Codes

Hanging QR Codes around my classroom is not the only way I have been using QR Codes.  After a little experimenting I was able to determine the size QR Codes needed to be on my SmartBoard in order to allow students, even in the back row, to scan the codes from their seats.  I also have begun to use QR Codes in my social studies unit guided notes.  I have created QR Codes that lead to non-fiction articles (hooray, common core!), videos, and even definitions that students match with vocabulary words.  These QR Codes are included right on the guided note packet that each student uses throughout the unit. 

QR Codes directly on guided notes.
In just a short time I have been able to begin implementing QR Codes in my classroom.  The students have been able to quickly understand how to use the app and have become adept at scanning the codes in an even shorter amount of time.  QR Codes are one of the coolest and one of the most time-saving techniques  I have been able to implement in my classroom.  I should note that this works well in my classroom because of the 1:1 student to iPod ratio.  If you are not able to provide 1:1 technology in your classroom the way you use QR Codes would need to be tweaked and may not work well for you. 

Note:
The site I have been using to create QR Codes is www.beqrious.com.  It is free and allows you to create and change the color of QR Codes for a wide variety of purposes.

Saturday, November 24, 2012

NYSCATE 2012


Earlier this week I had the exciting opportunity to attend the annual NYSCATE conference in Rochester, NY.  I wanted to give a quick recap of the sessions I attended, later on I will go into more detail and share how I implement what I learned in my own classroom.

My wife and daughter made the trip to Rochester with me, essentially to get out of the house for a few days.  I was glad to have them come and my four month old daughter handled the nearly four hour drive like a champ!  After checking in at the Radisson and getting situated I was able to register and catch the 3:00 session on Sunday. 

The first breakout session I attended was titled "Using QR Codes in the Classroom."  I knew the basics of Quick Response (QR) codes, but other than knowing that they could provide quick links to websites, wasn't sure how they could be used in the classroom.  Our former librarian had been adding them to library books allowing students to quickly go to the author's website, book reviews, and interviews (audio and video) with the author.  I thought this was a great idea, but most of the time students in the library didn't have access to a device to read the QR codes.  I was excited to learn about the many ways QR codes can be used; links, questions, email, text messaging and even for phone calls.  This session was especially exciting for me since I have a classroom set of iPod Touches in my classroom.  I now have a long list of ways I plan to use QR codes and will post to share my successes and speed bumps as I go.

The next thing I attended was a keynote address by Adam Bellow.  Adam had a very interesting outlook on technology and education in general.  Additionally, he was a very entertaining and fun speaker to hear as an audience member. 

The following morning after breakfast I attended "Real Results! Notifications that Positively Impact Community Engagement."  This sessions introduced and explained how the Honeoye Falls-Lima School District has implemented the use of Blackboard Connect to communicate with parents and community members.  This was one of my "future administrator" sessions, but I found that the session helped spawn a lot of ideas that I could also implement as a teacher.

Another keynote speaker, Scott Kinney, followed the first session.  The speaker was very engaging and shared a lot of great ideas and information, but really he was "preaching to the choir" trying to convince attendees of the value of technology in education.  Most of the audience was in attendance, because they already believed in the importance of technology in education.

A "Technology Leadership Roundtable" was the next session I attended.  Initially this was another of the "future administrator" sessions, but ended up being very valuable as a teacher as well.  The session provided a great opportunity to share the ways I am using technology in the classroom and hear about other exciting ideas.  It was also a chance to brainstorm solutions to some of the speed bumps we all face when using technology in the classroom.

Another keynote speaker followed during our lunch.  Mike Lorion talked about digital citizenship and different ways to teach the concept to students.  Many good ideas were shared, since we all know one of the biggest challenges when using technology is teaching students to use it appropriately.

Following an hour of exhibitor time, or as most people call it "collecting free stuff with logos of companies who no one can explain what they do," I attended "Edmodo for the Dodo."  I have used Edmodo here and there the past two years, but never really had the chance to dig deep into the features.  Not only did I learn about a lot of the ways Edmodo can be used in the classroom I also learned about many other online resources that can work hand in hand with Edmodo.

The last session I attended the following morning was "Get Racing with Mobile Devices."  This session showed how several teachers from different states collaborated to use iPods and iPads in an "Amazing Race"-like project. Students used math, geography, science and logic to plan a trip to the birthplaces of various Presidents.  As a social studies teacher I wouldn't be able to completely incorporate this project, but with a little tweaking, I may try to incorporate it in the state and country reports my students do each year.

Overall, I had a lot of fun and learned a ton of new ways to use technology in my classroom.  As I implement these new ideas, I will post about how things go on this blog.

Wednesday, September 12, 2012

Paperless Technology Usage in 2012-13

Every school year is a new beginning for both teachers and students.  This year is no different, in fact it is a year full of even more new beginnings.  This is the first year that our district has re-aligned to three elementary schools instead of four.  Due to declining enrollment and budgetary issues the district determined that it was necessary to eliminate an elementary school.  The students and much of the staff were relocated to the remaining three elementary schools.  In my homeroom class of 21 fifth graders 9 of the students are new to our elementary school.  This number includes both students who are new to the district and ones who attended fourth grade in the building that closed.

Last school year we had three sections of fifth and sixth grade.  Two were fifth grade classes with approximately 15 students in each class.  The third was a single sixth grade class with 24 students.  This year we have two fifth grades of 21 students and two sixth grades of approximately 18 students.  This realignment of the schools will allow me to work with more students.  It has also allowed us to truly departmentalize once again with a separate teacher for each of ELA, social studies, science and math.  Now instead of teaching three sections of social studies, a section of ELA and a section of reading, I am teaching four social studies sections and a single reading section.

Throughout the course of my teaching and especially last year, when I added the use of iPods to my classroom, I developed and borrowed/stole a lot of ways to use technology with ELA.  Some of the ways I used technology in my ELA class can be recycled and used in similar ways for social studies and reading.

Last year I had 19 iPod Touches to use in my classroom.  This made it possible to reach students 1:1 in my two fifth grade classes, however with 24 sixth graders I was unable to reach the 1:1 ratio. We were able to use the iPods, but the students were divided into small groups.  This year my original 19 iPods would not be enough for either of the fifth grade classes.  Since I knew this before the end of last school year I was able to gain access to 4 more iPods allowing me to have enough for 1:1 access for all of my classes.

Just as I did last year before we start using the iPod Touches in the classroom a Parent and Student agreement has to be sent home and signed by the student and parent.  (So far I have had about 90% of the agreements returned.)  Until I have them all, I won't begin any projects that involve using the iPods.  The agreement is a way to make sure parents and students are aware that iPod usage falls under the same technology usage agreement they have already agreed to follow.  It also makes sure students know they are responsible to immediately report any damage to me.  Additionally, it is a slight "scare-tactic" letting the students know that they may be responsible to replace iPods that are broken due to misbehavior/foolishness.

Even though we haven't started using the iPods, daily technology use is still a part of my classroom.  The first thing that we did in my classroom after going over the classroom and school rules/guidelines was to go over the rules when using the SmartBoard.  The rules are a simple, but necessary, step to ensure the SmartBoard can be used throughout the year and into the future.  Most days while I am teaching I feel more like a "game show host" than a teacher since I am constantly calling students to the front of the room to reveal notes, answer questions or do other things using the SmartBoard.  My goal is to allow the students to use the SmartBoard as much or more than I do.

I am looking forward to diving into technology even more this year, while using the technology to help teach to the new common core standards.  Technology in education should not be used just as bells and whistles.  Technology can be a hook to get a child's attention, but it needs to add to the lesson and learning.  I feel that using technology to add to lessons and education is one of my strengths, due in part to my graduate studies.

As the year continues I will share some of the successful and less than successful ways I have integrated technology into the curriculum and classroom.

Thursday, May 31, 2012

"Near" Paperless Research Practice

One of the skills that I feel is very important for students, regardless of their age, is the ability to find desired information while completing research.  When I was in school, and even during my early college years, finding research primarily involved looking through stacks and stacks of books.  Occasionally, we would get to use the microfiche reader, but the microfiche library was limited in regards to most topics.  Today information can be found with a simple internet search. Even though the searching process has been made easier, searching for information still requires a set of skills.

Instead of skimming for information while sifting through the stacks of books, today students need to know the best wording when completing an internet search.  They need to understand that sometimes simply switching one word can bring completely different search results.  Another lesson they need to learn is that being too specific, in many cases, will hinder an internet search.  Many of the students in my homeroom experienced this when working on a "Book Trailer" project earlier in the school year.  At first when my students were looking for a picture to represent a character they would search the exact name of the character.  In most cases this would lead to few or no images.  However, when students searched for "10 year old boy" instead of the character by name they were able to find many useful images.

My two fifth grade social studies classes are just beginning, World War II, our last unit of the school year.  For this exercise I created a partially filled chart (see the modified version at the bottom).  My students were in charge of using their Safari on their iPods or other sources (including their textbook) to complete the chart.  Some of the information to fill in the blanks in the chart would be easy to find, while I anticipated the information for other blanks would be more difficult to find.

Almost all of my students had a great deal of success when filling in the first two columns.  Most of the information was easy to find when using a search engine such as Yahoo or Google.  When creating the chart I had anticipated that the third column would be the most challenging for my students.  This was for the simple reason that despite many mini lessons a lot of my students still believe they are getting information from Yahoo and Google.  Of course, they are simply using Yahoo and Google as a way to search for information on other websites.

Overall, this activity was very successful.  It gave me a chance to reiterate that Yahoo and Google are not sources.  Additionally, it also gave my students a chance to practice their research and internet search skills.  In the future I hope to find a way (other than constantly switching between apps) to eliminate using paper for the chart.


Date
Event/Description
Source
January 30, 1933


France surrenders to the Axis Powers

December 7, 1941


Germany and Italy declare war on the U.S.  The U.S. declares war on the Axis Powers.

September 8, 1943


D-Day

April 12, 1945


Mussolini is killed.

May 1, 1945


Germany Surrenders

August 6, 1945


Second atomic bomb is dropped on Nagasaki.

September 2, 1945
 

Thursday, May 24, 2012

This article appeared in The Daily Star on May 18, 2012

Project brings world to students through technology

A few of my students working on the project.
ONEONTA -- Fifteen Valleyview Elementary School students are working regularly with their counterparts from around the world -- without leaving their building.

School librarian Emily Gibson has teamed up with fifth-grade social studies teacher Adam Hoover and his students in the "A Week in the Life" global collaboration project. Many talked about the experience Thursday at Valleyview.

It allows Oneonta students using iPod Touch mobile devices purchased through a community donation, along with existing school hardware, to collaborate on the Internet with 600 peers in 31 schools on four continents, for a better understanding of their similarities and differences, Gibson said.

Besides the United States, other countries include China, Lebanon and Australia.

The Oneonta students started their work, using a variety of software programs, in March.

They have divided into groups to explore a variety of themes: school, leisure, housing and transportation, language and clothing, food and celebrations and environment. They are already working on their final project, a multimedia project that will share photos and comments showcasing their topics.

Hoover said he and Gibson were looking at different projects that deal with "digital citizenship" including Internet safety, when they found this program. It went beyond that while addressing a curriculum that calls for learning about different cultures, he said.

"The technology is the hook that allows teachers to focus on education," he said. "Students are learning a lot and having a great experience without realizing it."

The project started by students recording a "digital handshake," introducing themselves to others around the world, Gibson said.

Fifth-grader Erin Stalder, who talked about the project Wednesday, said she is working in the "school" group. "We are talking with people around the world, learning about their cultures." This includes "taking pictures of Oneonta and putting them online to show others where we live."

In comparing her experience to others, she has been surprised to see how big some of the other school cafeterias area. She was glad she doesn't have to wear uniforms like some other students do.

Internet safety issues are addressed because no student last names are used, Gibson said. The project is helping students use the computer in a productive way.

This includes several students who were working on their projects Thursday. Shaun Jones said he is focused on housing and transportation. He has taken relevant pictures to show students in other locations what can be found here.

"I like the project," he said. "It involved learning many new things."

Cassidy Fetterman, is researching language and clothing. She was looking at photos of students and was glad that students in Oneonta did not wear uniforms that some of her counterparts did.

She has enjoyed talking pictures with the iPod and being able to describe them. She also enjoys commenting on others.

Paul Zimmer was looking at photos from all around the world. Working on schools, he had posted several photos of Valleyview. It was interesting to see how it compares to other facilities.

Friday, May 11, 2012

Paperless Assessments: Using Smart Response VE

For the past two years I have been using the Smart Response software and technology.  For those of you unfamiliar with the technology; each student has a "clicker" that allows them to answer questions.  A receiver is attached to the computer through a USB port.  Smart Response software allows for class lists to be input or imported into the program.  Each student on the list is assigned an ID # and the software can track assessment results, much like a computerized grade book

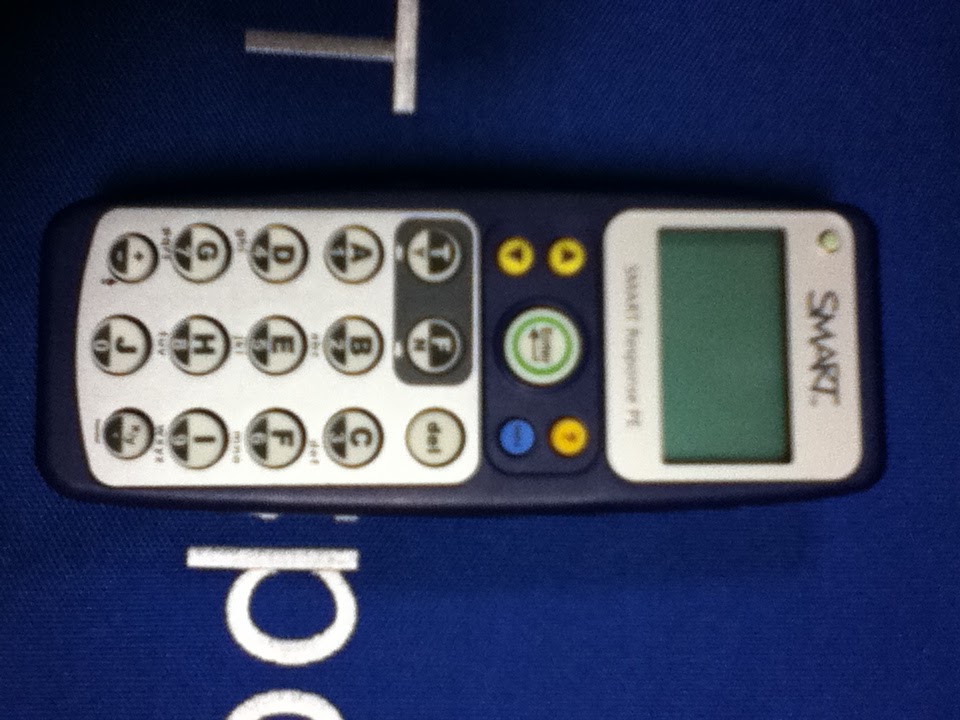
Smart Response PE Remote
 There are many great things this system offers.  Probably the best part is that it can offer instant feedback to both students and teachers about how well students perform on assessments.  It can be set up to show the results anonymously or it can be set up for the results to be "recorded" in the virtual grade book.  With either method the overall class results (percentage of students answering correctly) can be seen instantly in the form of a pie chart.  This allows teachers to reteach topics when overall the students did not perform well.  While it is probably not wise to project the individual results of questions, this information is also available at the touch of the mouse.

This system is great when giving short assessments.  For example a five question review to begin or end class works very well using this system.  Personally, I have also given longer assessments, however that is when issues arise.  The issues are not with the software or hardware, but with class management.  You see the questions are projected onto the SmartBoard.  Therefore students can only move as fast as the slowest person answering  in the class.  A few times last year I combated this by printing off paper copies of the assessment and then having the students enter the answers using the clickers.  This worked okay, but it then brought paper back into the equation.

Before I was able to find funding to purchase the class iPod Touches I heard that Smart was beta testing a new program called Smart Response VE.  This program was aimed at allowing students to use their iPods and phones as a clicker.  Smart Response VE was aimed more toward colleges.  Since some colleges had begun requiring students to purchase their own personal Smart Response clicker, VE would allow those students to save money and simply use their smartphones,  iPods, or other internet ready devices.  While I did not know all of the details about the new software, for me one of the most exciting parts was that the questions and answers would appear directly on the screens of the devices.  This would allow students to work at their own pace and go back on their own to check or change previous answers. 

Since Smart Response VE is aimed more at colleges than elementary, middle or high schools licenses are purchased per teacher.  Fortunately, there was still some money in the software budget that allowed the purchase of a license for my classroom until June 1, 2013.  Since I have only had about a week to experiment with Smart Response VE my experience is limited.  In fact I have not used the program for a quick assessment, only for a unit test.  Nevertheless, I wanted to share what we were able to do and how it works.


Creating the actual questions and answers is exactly the same as it was when using the PE remotes.  There are ways to import questions from Microsoft Word and a few other programs, but I have not had a chance to experiment with that feature yet.  Just as I did before upgrading to VE I start the class and begin the assessment.  Now instead of the students signing in using their PE remotes they go to the Smart Response website.  My students used the iPod Touches, but any internet enabled device would work the same way.

http://response.smarttech.com
To begin students must know their Student ID, which is the same number they have used in the past.  When the "Begin Assessment" button is clicked on the computer a window pops up showing the Assessment ID.  This does slightly slow down the beginning of assessments when compared to using the PE remotes.  I should clarify when I say slow down, I mean it takes 8-10 seconds instead of the normal 3-4 seconds. 

Once the students sign in, I can still see how they are progressing and if I choose what answers they have chosen.  There answers are not locked until they click submit after completing the questions.  There is a slight delay once the students have chosen their answers before it shows up on the computer, but it is not an extremely long delay (15-20 seconds in most cases).
Example True/False Question
Example Multiple Choice Question
In addition to the students being able to work at their own pace, students can also click the "Question List" link to see all of the questions and their current answer.  This can be extremely useful if the students need to go back and change an answer.  Using the PE remotes students could only see the question numbers, not the actual questions.
Question List, any question can be clicked on to change or review the answer(s).
Just like with the PE remotes, the software allows the teacher to determine if the students will see their results immediately upon submitting their answers or if they will have to wait until everyone is finished and the assessment has been stopped.
Submitting Answers
Overall, in my limited, experience I was and continue to be very excited about the ways I can implement Smart Response VE in my classroom.  To me the ability for my students to work at their own pace and the immediate feedback made the investment in the software worth it.